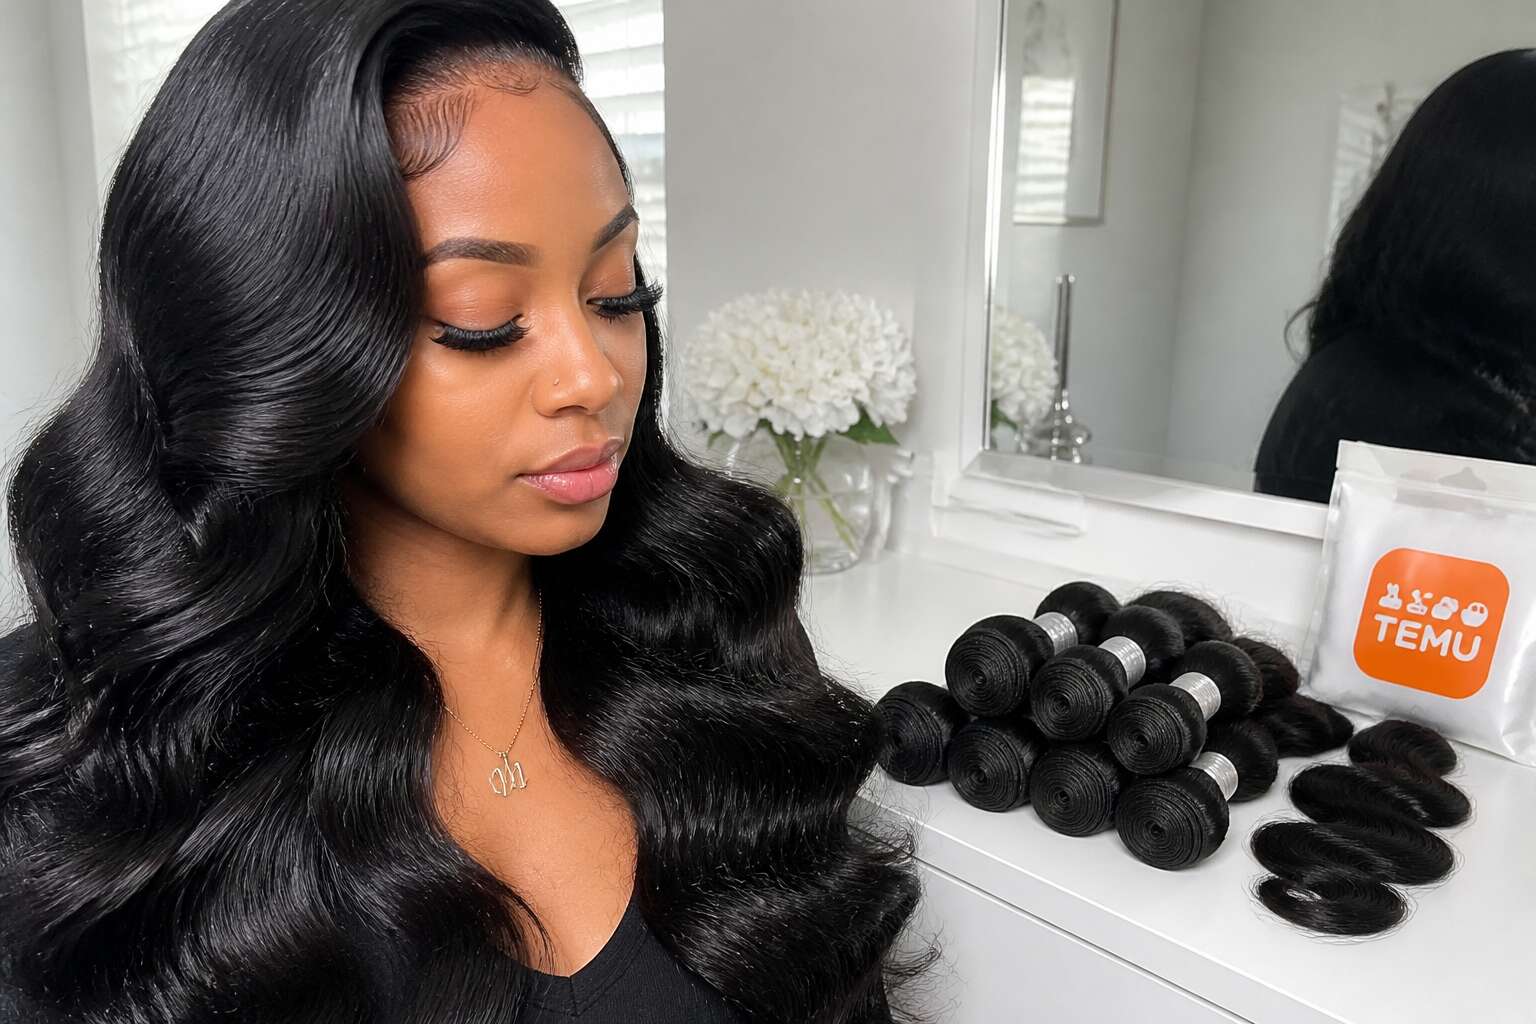
Understanding Budget Hair Extensions
The Appeal of Low-Cost Weaves
In South Africa, a bundle of human hair can cost more than a month of groceries. Temu weaves undercut that cost dramatically, offering synthetic and blended options for a few hundred rand. For many shoppers, that price gap redefines what a weave should be.
The attraction moves past the rand amount. You can experiment with length, colour, and texture without a long-term commitment. A low cost weave that lasts a few weeks lets you test a style before investing in premium hair. The risk is small, so the reward feels bigger.
- Low upfront cost permits frequent style changes.
- Buyer photos in reviews show honest results.
- Disposable pricing removes the guilt of cutting hair.
Temu weaves are not top tier human hair. They serve a different purpose for budget conscious buyers. Understanding that distinction helps you shop with clear expectations.
Where These Affordable Options Come From
Every bundle of Temu weaves begins in a Chinese factory, not in a salon. Large scale manufacturers extrude synthetic fibres such as kanekalon and toyokalon into long strands, then dye, curl, and machine stitch them into wefts. Online marketplaces buy these bundles in massive volumes and ship them directly to buyers, bypassing the wholesale distributors and brick and mortar retailers that drive up prices in South African hair shops.
The material choices explain the price difference.
- 100% synthetic wefts use heat resistant fibres that hold their wave pattern for weeks.
- Blended bundles combine human hair with synthetic strands to cut costs while keeping a natural texture.
- Clip ins and headband weaves face fewer construction demands, enabling faster production.
From my own testing, the density of the weft and the stitching quality matter most when deciding whether these temu weaves survive washing. Factory seconds and surplus stock also flow onto these platforms, which explains why two identical listings can perform so differently.
Common Materials Used in Inexpensive Hair
The material inside a budget bundle reveals more than any product photo ever could. Understanding budget hair extensions starts with the fibre, and the fibre starts with polymers. Polyethylene terephthalate (PET) gives inexpensive strands a stiff shine. PVC coatings add weight but little resilience. These materials dictate how the hair responds to water and heat.
When I assess a bundle, I check three things:
- Fibre flexibility under finger tension
- The scent of the coating; a chemical odour signals low grade polymer
- Weft density per centimetre, not per gram
The base weave also matters. Low density wefts save material, but the stitching loosens under tension. A high heat setting can warp synthetic strands permanently. From my own trials, temu weaves reveal material quality within one wash. Some bundles soften, others turn stiff and brittle.
Quality vs. Price: What to Expect
The gap between what budget bundles promise and what they deliver is where most disappointment begins. In my experience, temu weaves can either be a quiet victory or a loud lesson, often determined by how the hair reacts to everyday moisture and heat.
Quality expectations should shift when the price drops. For the cost of a single salon treatment, you can buy two or three budget pieces. That trade off matters. I have seen low cost wefts shed within three weeks, while others survive six months of steady braiding. The difference is rarely visible until the hair is washed.
- The way strands separate after a rinse
- The stiffness that appears once the fibre dries
- The tug you feel at the weft when detangling
These small signals tell you more than any listing photo. Temu weaves are not uniformly poor, but they are also not uniform at all. Each batch carries its own character, and that is the real price you pay. You trade predictability for possibility, and sometimes you win.
How to Select the Right Affordable Weave
Assessing Hair Texture and Density
Texture and density determine whether a bargain strand will behave or betray you. I have seen temu weaves that look flawless in the package and then turn into a bird’s nest within a week. In South Africa, where humidity and hair porosity vary wildly, the same weave can look like silk on one head and straw on another. Run your fingers across the weft. The cuticle should lie flat, not catch on your skin. Then inspect the density.
A quick check before purchase:
- Hold the weft up to natural light. See-through sections mean low density.
- Pinch the track between thumb and forefinger. It should feel substantial.
- Count the rows of stitching; more rows usually mean a sturdier base.
Density refers to how many strands are packed into each track. A 100 gram bundle may still look thin if the weft is loose. For a full yet breathable style, choose medium density that suits your natural hair volume. This matters more than the price tag when selecting temu weaves.
Choosing the Right Length and Color
Length and colour decide whether a weave looks intentional or accidental. On temu weaves, the same bundle can read differently against different skin tones. In my experience, a 16 inch track that frames a round face might overwhelm an angular one. Measure against your own proportions, not the model in the photos.
Colour matters. A jet black weft can look harsh under South African sun. A natural tone with subtle dimension blends better with your edges. The ends of the hair reveal the dye quality. Cheap dye jobs leave the tips lighter or brassy, and that ruins the whole look!
The factors that shift with every purchase:
- Your face shape and shoulder width determine the most flattering drop.
- Your natural hair colour underneath changes how the weave blends.
- The lighting in your daily environment alters how the shade reads.
The right combo makes even budget temu weaves look deliberate.
Reading Product Reviews and Ratings
The review section reveals the truth about temu weaves. A verified buyer’s photo shows more than any styled product shot. I skip the five star praise and find the people who photographed the hair flat on a kitchen table. That is the real colour, the real density, the real shine.
South African reviewers offer more useful feedback. Their comments about how a weave survives Durban humidity or Cape Town wind matter more than any studio lighting. I look for specific mentions of the ends after a week of wear.
The reviews I read most carefully share certain markers:
1. Photos that show the weft stitching clearly
2. Mention of the hair tangling after the first wash
3. A response from the seller to negative reviews
A rating without written context is useless. The buyers who describe the odour of the dye or the way the tracks slip give me the actual picture of that batch of temu weaves.
Comparing Vendors for the Best Deal
The same 4×4 closure on temu weaves can cost R150 from one vendor and R300 from another. I have bought from three different sellers in one week to test consistency. The first sent dry, brittle hair, the second sent a shade darker than the listing, and the third sent exactly what was promised. That third vendor earned my loyalty.
The cheaper option is not always the worst, nor is the expensive one always better. I check the seller’s response time to questions. A vendor who answers within hours stands behind their product, or at least behind their keyboard.
When comparing vendors, I weigh three factors:
- Price per gram, not per pack
- Number of wefts included
- Return policy for defective batches
The best deals on temu weaves come from sellers with a track record of consistent batches. I look for vendors with a year of sales history and repeat buyers.
Understanding Return Policies
When I buy temu weaves, the return policy tells me more than the glossy photos ever do. South African shoppers often overlook this document until a bundle arrives with missing wefts or hair that snaps on first comb. And I have learned to read the fine print before I part with my R250!
Three clauses matter most:
- Return window: are you allowed seven days or thirty?
- Photographic proof: will they accept video evidence?
- Refund method: store credit versus a full reversal to your card.
The selection process changes once you understand these terms. A vendor with a strict no-return stance forces you to examine every review thread for hidden complaints. I prefer sellers who offer replacement for defective batches, because that shows confidence. The right affordable weave is not the cheapest; it is the one with transparent rules.
Styling Techniques for Economical Weaves
Pre-Installation Preparation
With Temu weaves, preparation determines 80% of a weave’s lifespan. I always start by hydrating the hair for twenty-four hours, letting the cuticle absorb a light leave-in conditioner. This softens the fibers and reduces shedding during installation. Then I stretch the weft gently, using a steamer or a warm towel, to release any factory crimp.
For styling, use low heat and patience. Apply a heat protectant and set your tool to 180 degrees Celsius, never higher. Braid the natural hair flat and close to the skull to create a smooth base. When you part the weave, do it with a rat-tail comb, not your fingers, to avoid frizz.
- Detangle from tip to root
- Test a strand for heat tolerance
- Secure wefts with a curved needle
These steps improve the final look.
Sew-In vs. Glue-In Methods
The best Temu weaves look expensive because of how they are styled, not where they came from. I have watched affordable bundles transform completely under careful hands and fall apart under careless ones.
For sew-in installations, the braided base is everything. When natural hair lies flat and wefts are anchored with a curved needle, the hair moves like it belongs to the scalp. Glue-in methods are faster but riskier. Adhesive strips the fibers over time, and leftover bond can dull even the most promising bundles. In South African humidity, a lightweight serum before styling keeps the cuticle calm.
A few practices stay with me. I return to them every single installation.
- Work in small sections when applying heat
- Let each pass cool before touching it
- Brush downward, never upward, to keep the wefts flat
These habits extend the life of Temu weaves, regardless of the price tag.
Cutting and Customizing Your Weave
A hairdresser once told me that cheap hair only looks cheap when it’s cut straight across. I have found that true with Temu weaves. The weft line is my guide. I snip thread, not hair, to free each track, then lay the track on a mannequin to map the perimeter. A curved cut at the ends softens the fall. I add shallow layers around the crown to break the bulk. Those small adjustments stop economical bundles from looking boxy. For the face frame, I trim a few strands shorter and see how they respond to a comb. When cutting Temu weaves, I follow a simple sequence:
- Snip the weft thread first, never the hair mass
- Cut on a mannequin head to keep the shape even
- Trim tiny amounts, then step back and check the drape
That sequence prevents disaster. After cutting, I style with low heat and a boar bristle brush to smooth the fibers. The result looks professionally finished and moves naturally on the scalp.
Heat Styling Tips to Avoid Damage
Economical hair demands more care when heat enters the equation. I have styled Temu weaves with a flat iron set to 160 degrees Celsius, and the fibers held their shape without frizzing. Preparation and restraint make the difference. Before any heat touches the strands, I apply a lightweight thermal protectant and let it dry completely. Then I work in small sections, gliding the tool once, maybe twice, over each pass. Here is the sequence I follow:
- Set the heat to a moderate temperature, never above 180 degrees.
- Test a hidden strand first to see how the fiber responds.
- Use a comb to keep tension while the iron moves slowly.
After cooling, I finger comb the weave to restore movement. Steam from a hot towel can also refresh curls without direct heat. These methods keep Temu weaves looking supple and natural for weeks.
Creating Natural-Looking Part Lines
A clean part line separates a natural look from a cheap one. A R300 set of Temu weaves can look expensive after a two minute repositioning of the crown strands. Create the part deliberately, not by accident!
For a straight centre part, I take a rat-tail comb and draw one line from the forehead to the nape. Then I use the comb tip to lift the outer threads on each side, softening the edge and hiding the weft seam. A zigzag part is just as easy; it gives more scalp coverage for anyone with wider spacing.
Parting styles:
- A deep side sweep
- A gentle curve along the brow
- A diagonal temple to crown part
Once the line is set, I press the part with my palms for ten seconds and seal it with a mist of dry shampoo. Temu weaves keep this line all day.
Maintaining and Extending the Life of Your Weave
Washing and Conditioning Best Practices
Most temu weaves lose their charm after a few washes, but that is often our fault. Hot water and harsh shampoos are the usual culprits. Treat the hair with patience and a soft touch.
Start with a sulfate free cleanser and lukewarm water. Massage the scalp gently, then rinse thoroughly. Follow with a deep conditioner, focusing on the mid lengths and ends.
- Detangle using a wide tooth comb before wetting the hair
- Rinse with cold water to seal the cuticle
- Wrap in a microfiber towel to absorb excess moisture
Allow the weave to air dry naturally. Reaching for hot tools too soon will shorten its life. A little discipline in your routine means more weeks of beautiful hair.
Nighttime Care and Wrapping
Most temu weaves are lost to the pillow, not the wash basin. Nighttime friction is the quiet killer of low cost hair. A satin bonnet or silk scarf is non negotiable. Cotton pillowcases absorb moisture and create tangles that lead to breakage.
Before bed, gather the hair loosely. Use a wide tooth comb or your fingers. Then wrap the weave in a soft scrunchie, twisting it into a loose pineapple. This prevents the roots from pulling and keeps the ends from rubbing against your collar.
- Secure the wrap with bobby pins, not elastic bands
- Sleep on a satin pillowcase for double protection
- Re wrap in the morning to refresh the style
Taking five minutes each night adds weeks to the life of your weave.
Detangling and Brushing Techniques
Few actions determine how long your investment lasts like the first brush after installation. With temu weaves, the fibers often have a shorter lifespan, so detangling with intent matters more than expense. I work from the ends upward, holding the strand to prevent scalp tension.
Water helps. Spray a leave in conditioner before brushing, never dry. Use a wide tooth comb for wet sections, then switch to a soft bristle brush when the hair is fully detangled.
- Division into four sections prevents you from missing tangles
- Working from tip to root eases the strain on each strand
- Rinsing the comb frequently stops shed hairs from reknitting
Brushing too often creates friction that abrades the fibers. Once daily, or twice if needed, is enough. Two temu weaves I have worn lasted several extra weeks because I handled the strands gently.
When to Replace Your Weave
Six weeks is the average lifespan I have observed for temu weaves worn daily. It is a timeline that helps you plan.
The first sign of aging appears at the ends. Strands separate and feel rough. No conditioner will restore them. Shedding increases and the weave thins at the crown.
Extending the life of your weave depends on storage. Keep it on a silk hanger or in a satin bag. Rotate between two temu weaves if your budget allows. This habit doubles the life of each one!
Replace your weave when the fibers lose their bounce after washing. When the hair stays brittle after conditioning, it has reached its end. Do not wait for tangling to become unmanageable. A worn weave can mat and cause breakage. The money saved by wearing a weave too long is lost to the damage it leaves behind.
Common Mistakes to Avoid
Almost every damaged set of temu weaves I have seen came from a mistake after installation, not from the hair itself. The most common one is overloading the strands with oil. A thin sheen is enough; anything more just collects dirt.
- Wringing out the weave after washing. Sharp twisting splits the fiber.
- Combing from root to tip on wet hair. Start at the ends instead.
- Storing it while damp. This invites mildew and a stale smell.
These errors are easy to avoid once you know them. Let the weave air dry completely, use a wide tooth comb, and keep the oil bottle closed. Your hair will stay smooth for weeks longer!
Alternatives and Comparisons
Comparing Budget Weaves to Premium Brands
In South Africa, the price gap between a budget weave and a premium brand can exceed 1,000%. When comparing budget weaves to premium brands, the divergence shows up in fibre consistency and longevity. A R150 Temu weave may mimic the sheen of a R2,000 Brazilian unit at first, but after three washes, the distinction sharpens.
Premium brands use human hair with minimal chemical processing, preserving the cuticle alignment. Budget alternatives, often blends of synthetic and human strands, sacrifice structural integrity to keep prices low.
Consider the typical lifespan:
- Budget Temu weaves: 2 to 4 weeks before matting
- Mid-range options: 6 to 8 weeks with careful maintenance
- Premium brands: 3 to 6 months or longer
The price difference covers sourcing, grading, and quality control. For the South African buyer, choosing between Temu weaves and a premium brand means weighing short-term savings against repeated replacements. Your washing routine, local humidity, and willingness to reinstall determine whether the cost is justified.
Synthetic vs. Human Hair on a Budget
Synthetic strands in a Temu weave drop the price considerably. They also hold their curl pattern permanently, which removes restyling options after installation. Human hair, even lower grade bundles, responds to heat and chemical treatments. South African shoppers often overlook this distinction until the first wash.
For the most affordable route, choose based on your styling needs:
- 100% synthetic for a single weekend event
- synthetic blends for protective styles that stay untouched
- lower grade human hair for daily styling flexibility
Temu weaves labelled as human hair sometimes contain fibre blends that only reveal themselves after washing. A synthetic unit offers predictable performance for about R300. A short human hair weave provides styling freedom for around R800. Neither reaches the R2,000 Brazilian standard, but budget purchases answer a different question. Know what you are buying before you pair expectations with a parcel.
DIY Installation vs. Professional Help
Every Temu weave arrives with a promise, but the installation decides whether that promise holds. DIY installation saves the salon fee, yet it demands patience with needle, thread, and mirror angles. A professional charges more, but their hands have mapped the contour of a head many times over.
Consider the risks. A tight sew-in can pull at the edges. A glue application can leave residue that dulls the hair. For R150, a neighbour might do it; a trained stylist asks R500 or more. The price gap is real, and so is the outcome.
- DIY suits experienced hands
- Professional help suits beginners
- Half installs, like a leave-out comb, offer a middle path
Other Low-Cost Hair Options
Temu weaves are not the only low-cost hair option in South Africa. Local beauty supply stores carry synthetic braids and crochet hair, though I have found the price per pack often exceeds the Temu equivalent once transport and markup are added. Online marketplaces like Shein and Aliexpress offer similar prices, but shipping takes longer and returns get complicated.
Other low-cost options include clip-in ponytails, drawstring ponytails, and headband wigs. These need no needle or thread, which means no salon visit. A headband wig transforms a look in seconds and protects your natural edges because there is no tension on the hairline.
Crochet braids with marley hair or passion twists remain a strong alternative. A pack costs between R30 and R90 at a local shop, and installation takes an afternoon once you learn the loop method. Temu weaves give you density and length, while crochet gives you speed and scalp relief. The real difference is your time.



0 Comments